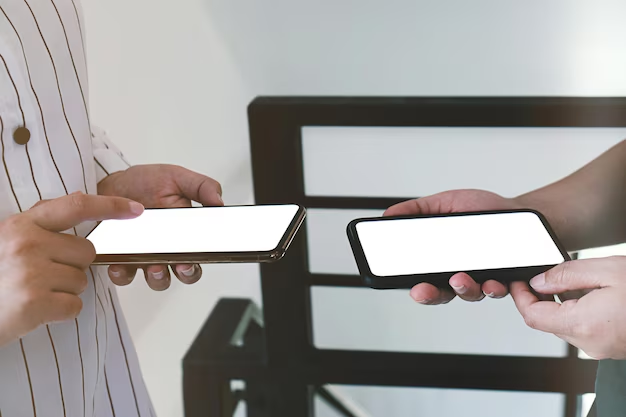
Seamless Transition: Moving Your Phonebook from Android to iPhone
Switching from an Android phone to an iPhone is an exciting journey, offering new features and a refreshed experience. However, amidst the anticipation, a fundamental task stands out: transferring your valuable contacts. Your phonebook, a digital repository of connections, is essential for maintaining personal and professional relationships. Fortunately, there are several methods to seamlessly transfer your contacts from Android to iPhone, each suited to different users and technical comfort levels. Let's explore these methods in detail to ensure your transition is smooth and stress-free.
Why Transferring Your Contacts Matters
Contacts are more than just phone numbers; they are gateways to your social and professional network. Ensuring these are safely transferred to your new iPhone means you won't miss an important call, message, or meeting. Whether you're using your device for work, to manage a social circle, or to keep in touch with family and friends, having all your contacts easily accessible is crucial. Let’s delve into how you can achieve this.
Preparing for the Transfer: A Checklist
Before you begin the transfer process, it's essential to have a few prerequisites in place. Here's a quick checklist to get you started:
- Ensure both devices are charged: A charged battery ensures the process isn't interrupted.
- Stable internet connection: Some methods require an internet connection, so be prepared.
- Updated software: Check that both the Android and iPhone are running the latest OS versions.
- Backup your data: It's always a good idea to back up your data before performing any major operations.
Method 1: Use the Move to iOS App
An Overview
The Move to iOS app is an official Apple application designed to help you move data from an Android device to an iPhone. It facilitates the transfer of contacts, message history, photos, videos, web bookmarks, mail accounts, and calendars.
Step-by-step Guide
Download & Install: Make sure you have the Move to iOS app installed on your Android device from the Google Play Store.
Initial Setup: Power on your new iPhone. During the initial setup, when you reach the "Apps & Data" screen, select "Move Data from Android."
Connect Devices: Open the Move to iOS app on your Android device and tap Continue. Accept the terms and conditions and tap Next.
Enter Code: A six-digit code will appear on your iPhone screen. Enter this code into the Move to iOS app on your Android device.
Select Data: On your Android phone, select the data you wish to transfer — contacts are included in this selection.
Transfer & Complete: Wait for the transfer to complete. It may take a while, depending on the amount of data. Once done, continue setting up your iPhone.
Why Use Move to iOS?
This method is ideal if you're starting fresh with a new iPhone and haven't completed its setup yet. It's comprehensive and handles multiple data types beyond just contacts.
Method 2: Using a Google Account
An Overview
This method leverages the synchronization features of your Google account. It's particularly useful if you frequently use Google services.
Step-by-step Guide
Sync Contacts on Android:
- Go to Settings on your Android device.
- Navigate to Accounts or Users & Accounts.
- Select your Google account.
- Ensure that "Contacts" is checked to sync.
Check Sync Status:
- Open the Google Contacts app or website to ensure your contacts are synced online.
Open iPhone Settings:
- Go to Settings > Passwords & Accounts > Add Account > Google.
Sign In and Sync:
- Log into the same Google account.
- Ensure the switch for Contacts is turned on.
View Transferred Contacts:
- Open the Contacts app on your iPhone to view your imported contacts.
Benefits of Using a Google Account
This method is straightforward and useful if you rely heavily on Google services. It also provides a backup of your contacts online.
Method 3: Manually Export and Import Contacts
An Overview
If you prefer more manual control, exporting and importing contacts as a VCF file gives you the flexibility to manage the data transfer process personally.
Step-by-step Guide
Export Contacts from Android:
- Open the Contacts app on your Android device.
- Go to Settings, then Export contacts.
- Save the contacts as a VCF file. You may need to choose where to export the file (e.g., Email, Cloud storage).
Transfer VCF File to iPhone:
- Email the VCF file to yourself or save it to a cloud service accessible from your iPhone.
- Open the email or cloud storage on your iPhone and tap on the VCF file.
Import Contacts:
- Follow prompts to "Add All" contacts to your iPhone.
When to Use This Method
Choose this method if you have a manageable number of contacts or prefer checking every step manually. It offers more control over the data being transferred.
Exploring Additional Subtopics
Managing Duplicate Contacts
After transferring contacts, you might encounter duplicates. The iPhone has built-in tools to help manage this. In the Contacts app, edit and merge entries under the same name for simplicity.
Keeping Contacts Up to Date
Transitions like these serve as an excellent opportunity to update your contacts. Take this time to add new information, remove outdated contacts, and organize your phonebook.
Using Third-Party Apps
Various third-party apps are available to assist in data transfers. While convenient, ensure you choose reputable apps to maintain data privacy and security.
⚡ Quick Summary
- Move to iOS App: Best for complete initial transfers during iPhone setup.
- Google Account: Ideal for those integrated with Google services.
- Manual Export/Import: Offers detailed control and flexibility.
Final Insights on Contact Transfer
Transitioning from Android to iPhone can initially seem daunting, but with the right method, it's a straightforward process that preserves the integrity and accessibility of your contacts. Whether you use Apple's dedicated app, a Google account, or undertake manual exportation, each method offers unique benefits tailored to varying preferences and technical comfort levels. Embrace the change, explore the new features your iPhone offers, and reach out effortlessly to your network knowing your contacts are right where they need to be.
Discover More
- How Can I Transfer a Video From Iphone To Computer
- How Can I Transfer Apps From Iphone To Ipad
- How Can I Transfer Bookmarks From One Computer To Another
- How Can I Transfer Contacts From Iphone To Iphone
- How Can I Transfer Contacts From One Iphone To Another
- How Can I Transfer Data From Iphone To Android
- How Can I Transfer Data From Iphone To Iphone
- How Can I Transfer Data From One Laptop To Another
- How Can I Transfer Files From Android To Pc
- How Can I Transfer Files From Pc To Pc