Mastering the Art of Tire Changing: How Long Does It Really Take?
Imagine you're cruising down the highway on a sunny afternoon, only to hear the unmistakable thump-thump of a flat tire. Changing a tire is an essential skill that can save you time and money, but how long should this seemingly straightforward task take? This question doesn't have a one-size-fits-all answer, as several factors can influence the time it takes. Let’s delve into these factors, understand the process, and learn tips to master tire changing like a pro.
Factors Influencing the Time to Change a Tire
1. Experience Level
Your experience level is perhaps the most significant factor:
Beginners: If it’s your first time, expect to devote more time to understanding each step. It might take about 30 to 60 minutes as you familiarize yourself with the tools and process.
Experienced Individuals: For those accustomed to changing tires, it usually takes 15 to 30 minutes, depending on the situation.
2. Tools and Equipment
Having the right tools readily available can significantly speed up the process:
Standard Tools: A jack, lug wrench, and spare tire are essentials. With these, you’re set to handle a standard tire change.
Additional Tools: A torque wrench or an electric impact wrench can make the process quicker, cutting down several minutes off your time.
3. Type of Vehicle
Different vehicles may present different challenges:
Compact Cars: Generally easier and quicker to manage because of their size and weight.
Large SUVs or Trucks: These may require heavier-duty equipment and additional effort, potentially lengthening the process.
4. Location and Environment
The site where your tire change occurs can drastically affect timing:
Garage or Driveway: A controlled environment with ample space and light can streamline the task.
Roadside: Limited space, safety concerns, and potential weather conditions could slow you down considerably.
Step-by-Step Guide to Changing a Tire
Changing a tire involves several sequential steps. Here’s a comprehensive guide to ensure efficiency and safety during the process:
Safety First
Before proceeding, ensure you’re in a safe environment:
- Move the vehicle to a flat, stable location.
- Turn on your hazard lights to alert other drivers.
- Apply the parking brake to prevent rollbacks.
Gather Your Equipment
Prepare your tools:
- Jack
- Lug Wrench
- Spare Tire
- Optional Tools: Flashlight, gloves, wheel wedges
Loosen the Lug Nuts
- Use the lug wrench to turn the nuts counterclockwise. Do not remove them completely just yet; merely loosen them.
Lift the Vehicle
Place the jack under the vehicle, aligning it with the manufacturer’s recommended lift point. Raise the vehicle until the flat tire is off the ground.
🔧 Tip: Always consult your vehicle’s manual for the correct jack placement and safety procedures.
Remove the Flat Tire
- Finish unscrewing the lug nuts and remove the tire. Be cautious, as it may be heavy.
Mount the Spare Tire
- Align the spare tire with the wheel bolts. Hand-tighten the lug nuts for initial placement.
Lower the Vehicle and Tighten Lug Nuts
Lower the vehicle until the spare tire just touches the ground, then tighten the lug nuts in a crisscross pattern using the wrench. Lower the car completely and double-check the tightness.
🔩 Crisscross Pattern Benefit: Ensures even distribution of pressure and secure tire placement.
Stow Equipment and Check Spare Tire Pressure
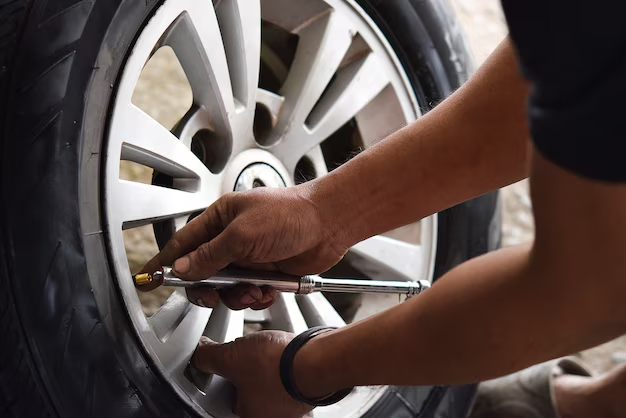
- Ensure all tools are stored back in their respective places. Check that the spare tire is inflated to the proper pressure.
Techniques to Reduce Tire Change Time
Preparation and Practice
Regular Checks: Familiarizing yourself with the tire change process and regularly checking your spare tire’s pressure can save time.
Practice Makes Perfect: Simulating a tire change in your driveway builds confidence and reduces anxiety in real situations.
Quality Equipment
Invest in good quality, easy-to-use tools to expedite the process. Professional-grade equipment like hydraulic jacks or electric impact wrenches can significantly cut down change time.
Emergency Kits
Keeping a well-stocked emergency kit can be a game-changer. Items like a flashlight, reflective vests, and gloves can enhance safety and efficiency.
Troubleshooting Common Issues
Sometimes, unexpected issues arise. Here’s how to navigate some common problems:
Stuck Lug Nuts
- Solution: Using penetrating oil can help loosen them. A breaker bar might assist in applying more torque.
Jack Slippage
- Solution: Always use the jack on a solid, flat surface. Consider carrying a small piece of plywood to create a stable base if necessary.
Tire Won’t Come Off
- Solution: Use a rubber mallet to gently tap the tire, breaking the rust bond that may have formed.
Visually Distinct Summary Section
Here's a quick reference to keep you on track during your tire-changing experience:
🛠️ Quick Tire Change Tips:
- Preparation: Practice regularly and know your equipment.
- Tools: Invest in quality for efficiency.
- Location: Choose a safe and stable spot.
- Process:
- Loosen, Jack, Replace, Tighten.
- Safety: Use gloves, hazard lights, and the parking brake.
Changing a tire is a valuable skill, not just for emergencies, but for empowering you with the confidence that comes with hands-on problem-solving. With practice and the right tools, you can significantly reduce your tire change time, turning a potentially stressful situation into a manageable task. And remember, in the tire-changing marathon, preparation is your best ally. Happy driving, and safe travels!
Related Topics
- How Can I Change Text Message To Imessage
- How Can You Change a Jpeg To a Pdf
- How Do I Change a Jpeg To a Pdf
- How Do I Change a Pdf To a Jpg
- How Do I Change a Pdf To a Word Document
- How Do I Change a Repeating Decimal To a Fraction
- How Do I Change a Text Message To An Imessage
- How Do I Change From Text To Imessage
- How Do I Change Lowercase To Uppercase In Word
- How Do I Change My Political Party To Independent
