Master the Art of Changing a Bicycle Tire: A Step-by-Step Guide
Picture this: you're out enjoying a leisurely bike ride, the sun on your back, the road unfurling ahead of you. Suddenly, you feel that dreadful, unmistakable wobble of a flat tire. Don’t let this common hiccup deflate your adventure. With the certainty of understanding and a little practice, you can quickly get back on track. This guide will walk you through changing a bicycle tire, transforming a seemingly daunting task into a simple, manageable skill.
Why It's Essential to Know How to Change a Bicycle Tire
Understanding how to change a bicycle tire is invaluable for several reasons:
- Empowerment: Taking control of minor repairs lets you ride with confidence, knowing you're self-sufficient.
- Cost Efficiency: DIY tire changes save you money on repair services.
- Time-Saving: Fixing a flat tire yourself means you can avoid unnecessary delays.
Before You Begin: Tools and Preparation
Being prepared is half the battle. Ensure you have a well-equipped bike repair kit. Here's what you'll typically need:
- Tire Levers: Plastic or metal tools used to pry the tire from the rim.
- Spare Inner Tube: Match the size and type to your current tire.
- Patch Kit: Contains patches, glue, and sandpaper to repair minor punctures.
- Bike Pump or CO2 Inflator: For inflating your tire post-repair.
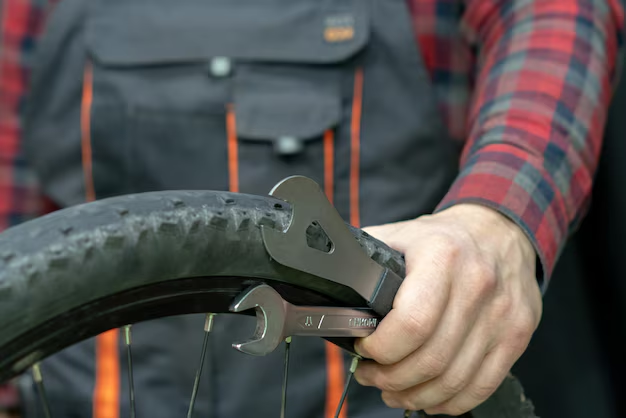
- Wrench (if applicable): To remove the wheel if your bike doesn’t have quick-release levers.
Step-by-Step Guide to Changing a Bicycle Tire
Step 1: Remove the Wheel
- Shift the Gears: If working on the rear wheel, shift to the smallest gear.
- Release the Brakes: Some bikes have brake quick-releases to make this easier.
- Undo the Quick Release or Nuts: For quick-release levers, open the lever and unscrew slightly. Use a wrench for nut-secured wheels.
- Extract the Wheel: Pull the wheel from the frame gently.
Step 2: Remove the Tire
- Deflate Completely: Release any remaining air by pressing on the valve.
- Insert Tire Levers: Slip a lever under the bead of the tire and pry over the rim.
- Remove the Tire: Slide the lever along the rim or use additional levers to lift the bead all around the rim.
- Extract the Inner Tube: Pull it out carefully without damaging the valve stem.
Step 3: Inspect and Prepare
- Check the Tire and Rim: Feel inside the tire and along the rim for sharp objects.
- Patch or Replace the Tube: If the tube has a minor puncture, patch it up. Otherwise, replace it with a new tube.
Step 4: Install the New Tire
- Position the Tube: Inflate the tube slightly to give it shape, then insert it into the tire.
- Mount the Tire: Seat one side of the tire on the rim, then slip the tube valve through the rim hole. Slowly work the other side of the tire onto the rim.
Step 5: Inflate and Reattach the Wheel
- Inflate the Tire: Add air gradually, ensuring the tube isn't pinched between the rim and tire.
- Secure the Wheel: Place the wheel back on the bike, secure it using the quick release or nuts, and reattach any brake mechanisms.
Troubleshooting Common Issues
Changing a bicycle tire might not always go smoothly, but you can troubleshoot common hitches with ease.
- Difficulty Mounting the Tire: Ensure the bead is seated properly by deflating the tire slightly if needed to adjust.
- Persistent Punctures: Double-check the tire and rim for embedded debris or wear that might cause repeat punctures.
- Leaking Valve: Ensure the valve is correctly tightened to avoid air loss.
📝 Key Takeaways
- Prepare Proactively: Keep essential tools handy to tackle mid-ride emergencies confidently. 🧰
- Practice the Process: Familiarize yourself with each step to enhance speed and efficiency. 🚴♂️
- Regular Maintenance: Regular tire checks prevent unexpected punctures. 🔧
Enhancing Your Bicycle Knowledge with Related Skills
Beyond the immediate task of changing a tire, enriching your cycling know-how adds value to your riding experience.
Using a Patch Kit
Mastering the use of a patch kit allows you to repair tubes on the go, conserving resources and time.
Bike Tire Pressure Basics
Understanding optimal tire pressure enhances ride quality, reduces wear, and improves safety.
- Regular Checks: Aim to check tire pressure at least once a week.
- Use a Pressure Gauge: Relying on feel alone can be misleading.
- Consult Tire Sidewalls: Pressure ranges are often indicated there.
Essential Bike Maintenance Skills
Incorporating other maintenance skills ensures you place priority on safety, performance, and longevity:
- Lubricating the Chain: Prevents wear and tear and ensures smooth gear changes.
- Brake Adjustments: Regular checks maintain your stopping power and safety.
Encouraging DIY Confidence
The act of changing a bicycle tire is more than a convenience; it’s an investment in independence and peace of mind. Many cyclists, from beginners to seasoned riders, have found that expanding their repair skills fosters a deeper connection with their bike, making each journey a bit more enriching.
Exploring the world of bike maintenance opens doors to enhanced cycling experiences, a satisfying blend of proficiency and freedom on two wheels. Embrace this learning opportunity, and empower yourself with the confidence to handle any roadblocks (or wheel pops!) that come your way.
When you hear the distinct hiss of a troubled tire on your next adventure, remember: you're equipped, educated, and well-prepared to remedy the situation, ensuring the road ahead is clear and your ride remains smooth. 🚵
By incorporating these practices and insights into your routine, you cultivate a deeper bond with your bike and embrace every journey with unparalleled enthusiasm and readiness. Safe travels, and happy cycling!
Related Topics
- How Can I Change Text Message To Imessage
- How Can You Change a Jpeg To a Pdf
- How Do I Change a Jpeg To a Pdf
- How Do I Change a Pdf To a Jpg
- How Do I Change a Pdf To a Word Document
- How Do I Change a Repeating Decimal To a Fraction
- How Do I Change a Text Message To An Imessage
- How Do I Change From Text To Imessage
- How Do I Change Lowercase To Uppercase In Word
- How Do I Change My Political Party To Independent
