Transform Your Lawn with Ease: A Step-by-Step Guide to Changing a Sprinkler Head
A well-maintained lawn can transform the curb appeal of your home, providing an inviting green space that complements the surrounding environment. A critical component of lawn care is an efficient irrigation system, and at the heart of that system are sprinkler heads. Over time, sprinkler heads can become damaged or clogged, reducing their effectiveness. Learning to change a sprinkler head is a valuable skill for any homeowner. This guide will walk you through the process, providing comprehensive insights and tips to ensure your lawn receives the hydration it deserves.
💡 Why You Might Need to Change a Sprinkler Head
Sprinkler heads may require replacement for several reasons:
- Damage: Lawn equipment, foot traffic, or pets can cause physical damage to sprinkler heads.
- Poor performance: Clogged, broken, or leaking heads can lead to uneven watering.
- Upgrades and efficiency: Newer sprinkler models often offer better water conservation and coverage options than older models.
Understanding why a change is necessary can help you address any underlying issues that might affect your entire irrigation system.
🧰 Gathering Your Tools and Materials
Before you begin, gather the necessary tools and materials. Having everything on hand will save time and make the process smoother.
Tools You’ll Need
- Shovel: For digging up the area around the sprinkler head.
- Pliers or a wrench: For removing the old sprinkler head.
- Screwdriver: Some types of sprinkler heads require a screwdriver for assembly or adjustment.
Materials Required
- Replacement sprinkler head: Ensure it matches the specifications (thread size and flow rate) of the old one.
- Teflon tape: Helps ensure a secure, leak-free connection.
- Repair riser (optional): In case the existing riser is damaged.
🏃♂️ Step-by-Step Guide to Changing a Sprinkler Head
Now that you have your tools and replacement parts, let’s dive into the hands-on process of changing your sprinkler head.
Step 1: Turn Off the Water Supply
Before starting, turn off the water to your irrigation system. This step is crucial to prevent water from spraying everywhere and to avoid muddy conditions as you work.
Step 2: Locate and Dig Around the Sprinkler Head
- Use your shovel to gently remove the turf and soil around the sprinkler head.
- Dig a wide enough area to allow you comfortable access to the sprinkler head. Be careful not to damage the surrounding turf and keep the removed soil and grass intact for reinstallation.
Step 3: Remove the Old Sprinkler Head
- Use pliers or a wrench to unscrew the old sprinkler head from the riser.
- If the head is sticky or difficult to remove, apply a little more force with caution to avoid damaging the riser beneath.
Step 4: Examine and Prepare the Riser
- Inspect the riser for any cracks or damage. If necessary, replace it with a new riser.
- Clean the riser threads to remove dirt or debris to ensure a smooth connection.
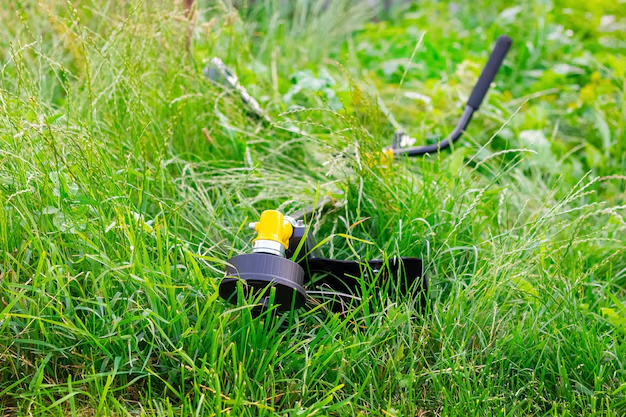
Step 5: Install the New Sprinkler Head
- Wrap the threads of the riser with Teflon tape to ensure a tight, leak-free seal.
- Screw the new sprinkler head onto the riser by hand, and use pliers or a wrench to tighten it securely without over-tightening.
Step 6: Test the New Sprinkler Head
- Turn the water supply back on and activate the sprinkler system.
- Observe the new sprinkler head to ensure it is operating correctly and adjust the spray pattern if necessary.
Step 7: Backfill and Restore the Area
- Carefully backfill the soil around the new sprinkler head, ensuring it is level with the surrounding grass.
- Replace the turf, pressing it down firmly to avoid leaving any tripping hazards or uneven surfaces.
🌿 Tips for Maintaining Your Sprinkler System
Regular maintenance can significantly extend the life of your irrigation system and ensure efficient water usage:
- Regular Inspections: Periodically check for leaks, clogs, or other forms of damage.
- Seasonal Adjustments: Adjust spray patterns and water schedules according to seasonal needs.
- Winterization: In colder climates, properly winterize your system by draining water to prevent freezing and damage.
🔄 Transitioning to Different Sprinkler Technologies
As technology advances, newer sprinkler systems often come with improved efficiency and additional features. If you're considering an upgrade, here are some alternatives to traditional sprinkler heads:
Rotary Nozzles
These nozzles provide more uniform water distribution, are known for their efficiency, and are especially useful for large areas of turf.
Smart Irrigation Systems
Smart systems can be controlled from a smartphone or computer and adjust watering schedules based on weather conditions, potentially reducing water usage.
📋 Key Takeaways
Here’s a handy summary to keep your sprinkler system in top shape:
- Check Regularly: Routine checks prevent serious issues.
- Match Specifications: Ensure replacements match the original head’s specifications.
- Stay Up-to-Date: Consider upgrading to more efficient technologies if feasible.
🎉 Master Your Lawn Maintenance
Changing a sprinkler head is a straightforward task when you’re prepared and informed. Not only does it ensure the health of your lawn, but it can also help conserve water and save money on utility bills. By following this guide, you’re well on your way to mastering one of the many skills involved in comprehensive lawn care maintenance.
By investing time in understanding and maintaining your sprinkler system, you’ll enjoy a lush, beautiful lawn that enhances your home’s appeal while practicing environmentally friendly gardening. Happy gardening!
Related Topics
- How Can I Change Text Message To Imessage
- How Can You Change a Jpeg To a Pdf
- How Do I Change a Jpeg To a Pdf
- How Do I Change a Pdf To a Jpg
- How Do I Change a Pdf To a Word Document
- How Do I Change a Repeating Decimal To a Fraction
- How Do I Change a Text Message To An Imessage
- How Do I Change From Text To Imessage
- How Do I Change Lowercase To Uppercase In Word
- How Do I Change My Political Party To Independent
