How to Easily and Safely Change a Tire on Your Car
Imagine this scenario: you're driving down a country road on a sunny afternoon, and suddenly, you hear a loud thud. You pull over and discover a flat tire. Even seasoned drivers dread this moment. However, the process of changing a tire doesn't need to be daunting. Equipping yourself with the knowledge of how to effectively change a tire can save you time, money, and the hassle of waiting for roadside assistance. In this guide, we’ll cover everything you need to know to change a tire like a pro.
📌 Why Knowing How to Change a Tire is Essential
Changing a tire is one of the essential life skills you might not think about until you need it. There are clear advantages:
- Independence: No need to rely on help when you're stuck in a remote location.
- Saves Money: Avoid fees charged by roadside services.
- Safety: Reduces risk, as you’re not waiting on the roadside for extended periods.
- Confidence: Boosts your self-reliance and driving skills.
Gathering Your Tools and Gear
Before diving into the step-by-step process, let's first consider the necessary tools to have on hand:
- Spare Tire: Ensure it's properly inflated and in good condition.
- Jack: A car jack to lift your vehicle off the ground.
- Lug Wrench: For loosening and tightening the lug nuts.
- Car Owner’s Manual: Can be invaluable for vehicle-specific instructions.
- Wheel Wedges or Bricks: To prevent the car from rolling.
- Flashlight and Gloves: Helpful for nighttime attempts or adverse conditions.
- Reflective Triangle and Vest: Provide safety by making you visible to oncoming traffic.
Step-by-Step Guide to Changing a Tire
1. Safety First: Pull Over to a Safe Spot
Find a flat, straight stretch of road away from traffic. Turn on your hazard lights to alert other motorists. If it's dark, use your flashlight and wear a reflective vest for added visibility.
2. Secure Your Vehicle
- Use Wheel Wedges: Place these in front of or behind your tires to ensure the car doesn't roll. Front-wheel drive? Wedge the rear tires. Rear-wheel drive? Wedge the front tires.
- Engage the Parking Brake: This further ensures the car won't move as you work.
3. Access Your Tools
Retrieve your spare tire, jack, and lug wrench from your trunk. Your owner’s manual may provide additional guidance on accessing these in your specific vehicle model.
4. Loosen the Lug Nuts
Using the lug wrench, loosen the lug nuts by turning them counter-clockwise. Do not fully remove them yet; just break their resistance. This is easier while the tire is still on the ground.
5. Lift Your Vehicle with the Jack
- Position the Jack: Place it under the vehicle frame, referring to your manual to find the correct jacking point.
- Lift the Car: Crank the jack until the tire is about six inches off the ground.
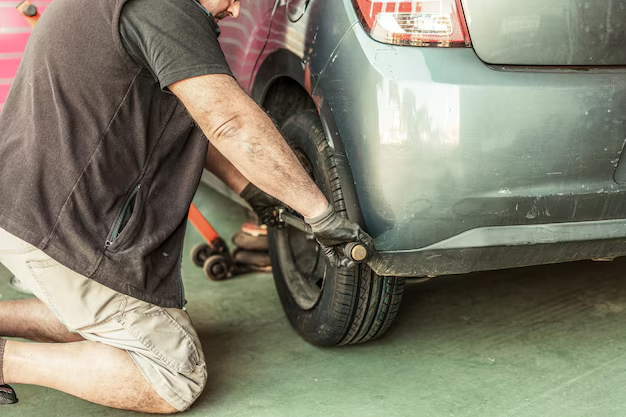
6. Remove the Flat Tire
Fully unscrew and remove the loosened lug nuts. Carefully take the flat tire off the hub and place it under the vehicle as a safety measure, ensuring the jack doesn’t fail.
7. Mount the Spare Tire
Align the spare tire with the wheel bolts. Push it onto the hub until they're sticking through the rim.
8. Replace and Tighten Lug Nuts by Hand
Place the lug nuts back on and tighten them by hand. Tighten in a star pattern to ensure even distribution (imagine drawing a star as you move from nut to nut).
9. Lower the Vehicle and Tighten Lug Nuts
- Lower the Car: Use the jack to bring the vehicle back to the ground, removing the spare tire used as a safety measure.
- Fully Tighten Lug Nuts: Tighten them using the lug wrench, again in a star pattern. This ensures they're secure.
10. Clean Up and Final Checks
- Remove Wheel Wedges: Don’t forget to pick these up and store them.
- Check Tire Pressure: If possible, use a tire gauge to check your spare's pressure.
- Pack Tools: Make sure all tools and your flat tire are safely packed away.
Additional Considerations and Tips
Pros and Cons of Different Spare Tires
Most cars including compact spare tires, also known as "donuts." These are lighter and save space but aren't a long-term fix for travel.
- Full-Size Spare: Equivalent to your regular tires; more durable, but takes up more trunk space.
- Compact Spare: Smaller and lighter but with limitations on speed and distance.
What to Do Post-Tire Change
After getting your spare tire securely in place, it’s advisable to:
- Head to a tire shop. A professional can check for further damage, replace the flat tire, or confirm the integrity of the spare.
- Maintain driving limits. Compact spares are typically only rated for 50 mph and should not be driven for more than 70 miles.
🔍 Quick Tips for Tire Maintenance
- Regular Inspections: Check your tire pressure monthly, ensuring all tires (including the spare) are inflated per your car’s specifications.
- Rotate Tires: Keep wear balanced by rotating tires about every 6,000 to 8,000 miles.
- Stay Equipped: Always check that your spare is in good condition and that all your tools are present.
🚗 Tire-Change Summary Checklist
Here's a handy checklist to carry with you for those unexpected tire emergencies:
- 🛠 Tools Needed: Spare tire, jack, lug wrench, wheel wedges
- ⏩ Quick Steps:
- Pull over safely
- Secure vehicle
- Loosen lug nuts
- Use jack to lift car
- Remove and replace the tire
- Tighten lug nuts in star pattern
- Lower vehicle and clean up
- 🔄 Post-Change: Visit a tire shop ASAP
By following these guidelines and being prepared, you can turn a flat tire from a dreaded problem into a temporary setback. No longer will you be caught off guard — instead, you’ll face such situations with calm confidence. Safe travels!
Related Topics
- How Can I Change Text Message To Imessage
- How Can You Change a Jpeg To a Pdf
- How Do I Change a Jpeg To a Pdf
- How Do I Change a Pdf To a Jpg
- How Do I Change a Pdf To a Word Document
- How Do I Change a Repeating Decimal To a Fraction
- How Do I Change a Text Message To An Imessage
- How Do I Change From Text To Imessage
- How Do I Change Lowercase To Uppercase In Word
- How Do I Change My Political Party To Independent
