Master the DIY: Changing a Wall Outlet Safely and Efficiently
Ever stared at that old wall outlet that seems to clash with your room’s decor or, worse, has stopped working altogether? Changing a wall outlet can seem like a daunting task, especially if you’ve never done it before. But with a bit of guidance, a pinch of patience, and some essential safety tips, you can transform this home improvement task into a simple DIY project anyone can tackle. Whether you’re looking to update your fixtures or need to replace a malfunctioning outlet, we’ve got you covered.
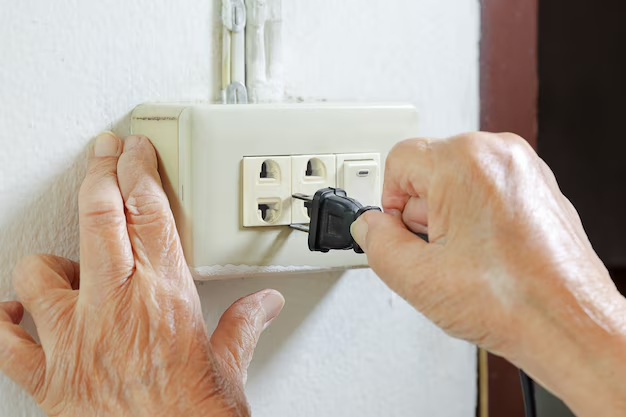
Understanding Wall Outlets 🔌
Let’s start with the basics. A wall outlet, also known as a receptacle or socket, is a point in the electrical system where you can connect your devices to receive power. Outlets come in various styles, including standard, GFCI, and USB-enabled units. But before diving into any changes, understanding the type of outlet you’re working with is crucial.
Types of Wall Outlets
Standard Outlets: These are the most common and feature two or three-prong receptacles.
GFCI Outlets: Ground Fault Circuit Interrupter outlets have a test and reset button, specifically designed to protect people from electrical shock, making them ideal for kitchens and bathrooms.
USB Outlets: These outlets provide the convenience of plugging in USB devices directly.
Why Change a Wall Outlet?
There are several reasons why you might want to change a wall outlet:
- Enhancement: Upgrade to an outlet with additional features like USB ports.
- Safety: Replace faulty or damaged outlets to prevent electrical hazards.
- Decor: Switch outdated outlets for modern finishes that match your home’s style.
Safety First: Precautions Before You Start ⚠️
Safety is paramount when dealing with electricity. Here’s how to ensure a secure work environment:
Essential Safety Tips
- Turn Off Power: Always turn off the power at the circuit breaker to avoid any accidental shocks.
- Test the Outlet: Use a voltage tester to ensure the electricity is completely off at the outlet.
- Avoid Moisture: Ensure your working area is dry, especially if you're changing an outlet in bathrooms or kitchens.
Tools You’ll Need 🛠️
Having the right tools at your disposal makes the job quicker and simpler. Here’s a checklist for replacing a standard outlet:
- Flathead screwdriver
- Phillips screwdriver
- Voltage tester
- Wire stripper/cutter
- Needle-nose pliers
- Replacement outlet
- Electrical tape
Step-by-Step Guide to Changing a Wall Outlet
Now that you’re equipped with the knowledge and tools, let's look at the actual steps involved in replacing a wall outlet.
Preparation
- Gather Your Materials: Ensure you have all tools and your new outlet ready.
- Turn Off the Power: Locate your home’s electrical panel and shut off the breaker connected to the outlet you’re replacing.
- Double-Check for Safety: Use the voltage tester on the outlet to confirm there is no electricity.
Removing the Old Outlet
- Unscrew the Outlet Cover: Remove the cover plate using your flathead screwdriver.
- Remove the Screws: Unscrew and pull the old outlet from the wall box without touching any wires.
Wiring the New Outlet
Take Note of Wire Connections: Before disconnecting, notice where each wire is attached (usually black for hot, white for neutral, and green or bare for ground).
Disconnect Old Outlet: Use needle-nose pliers to disconnect the wires from the old outlet.
Prepare the New Outlet: If needed, use your wire stripper to expose about half an inch of the wire ends.
Connect Wires to New Outlet: Attach the wires to the corresponding terminals on the new outlet:
- Black (hot) to the brass screw
- White (neutral) to the silver screw
- Green/Bare (ground) to the green screw
Secure the Connections: Ensure all wire connections are snug and secure. Wrap the outlet with electrical tape for added safety.
Final Steps
- Mount the Outlet: Gently push wires back into the wall box and secure the outlet with screws.
- Replace the Cover Plate: Screw the faceplate back on and ensure it’s flush against the wall.
- Restore Power: Go back to your electrical panel, turn the circuit breaker back on, and test the outlet with a device or tester to confirm it works.
Special Considerations for GFCI and USB Outlets
While the general steps for changing outlets are similar, there are additional considerations when upgrading to GFCI or USB outlets.
Installing GFCI Outlets
GFCI outlets have similar wiring but include a “line” (power supply) and “load” (additional outlets) connection. Carefully follow instructions that come with the GFCI unit to ensure proper installation for shock protection.
Adding USB Outlets
USB outlets may require slightly larger boxes to accommodate extra wiring and often incorporate a mix of standard receptacles and USB ports. Ensure your circuit can handle the additional load if it supports many high-power devices.
Troubleshooting Tips for New Outlets 🛠️
Replacing the outlet doesn't always mean it will work perfectly on the first try. Here are some troubleshooting tips:
- Outlet Doesn’t Work: Recheck that wires are correctly attached and screws are tight.
- Sparks on Connection: Ensure power is off during installation and secure loose wires.
- Partially Working Outlets: Check all connections and consider potential upstream or false GFCI trips impacting power flow.
Key Takeaways and Practical Tips 📝
To wrap up our journey into the DIY world of changing wall outlets, here are summarized points to keep in mind:
- Safety First: Always double-check that the power is fully off before starting any electrical work.
- Right Tools: Keep your toolkit well-stocked for efficiency and safety.
- Wire Carefully: Correctly differentiate wire types to prevent improper connections.
- Inspect Your Work: Verify that your connections are tight and that everything is seated correctly.
- Test After Installation: Always test new installations to assure everything functions as it should.
🔋 Summary Quick Check:
- Ensure compatibility between existing setup and new outlet type.
- When in doubt about potential issues or risks, consult with a professional electrician.
- Keep an eye on outlet conditions; replace if signs of damage occur such as cracks or scorch marks.
With these guidelines in hand, you are well-prepared to tackle changing a wall outlet confidently and safely. This seemingly small change can enhance your home’s functionality and aesthetics, perfectly blending utility with style. So go ahead, turn this project into a satisfying and rewarding DIY success!
Related Topics
- How Can I Change Text Message To Imessage
- How Can You Change a Jpeg To a Pdf
- How Do I Change a Jpeg To a Pdf
- How Do I Change a Pdf To a Jpg
- How Do I Change a Pdf To a Word Document
- How Do I Change a Repeating Decimal To a Fraction
- How Do I Change a Text Message To An Imessage
- How Do I Change From Text To Imessage
- How Do I Change Lowercase To Uppercase In Word
- How Do I Change My Political Party To Independent
