Transform Your Home: A Step-by-Step Guide to Changing an Electrical Outlet
When it comes to refreshing your living space, small changes can have a significant impact. One such update is replacing an electrical outlet. Whether you're upgrading to a more contemporary design, adding USB ports, or simply worn out and need replacing, updating an outlet can modernize and add functionality to your home. This handy guide will take you through the key steps to changing an electrical outlet, ensuring you tackle the task safely and effectively.
⚠️ Safety First: Preparing for the Job
Before diving into the process of changing an electrical outlet, it's crucial to prioritize safety. Electricity, while essential, can be dangerous if not handled correctly.
Ensure Safety with These Steps:
- Switch Off the Power: Prior to any work, turn off the circuit breaker associated with the outlet. This is essential to prevent electric shocks.
- Confirm with a Voltage Tester: Use a voltage tester to ensure the outlet is completely de-energized. This step verifies that the power is off and the workspace is safe.
- Gather Your Tools: Have your screwdriver, voltage tester, wire strippers, and the new outlet ready. Preparation makes the process more efficient and reduces trips back and forth to your toolbox.
🧰 Tools of the Trade: What You'll Need
Being equipped with the right tools not only ensures safety but also makes the project straightforward.
Essential Tools for the Task:
- Flathead and Phillips Screwdrivers: For removing and securing screws.
- Needle-Nose Pliers: Handy for gripping and manipulating wires.
- Wire Strippers: Essential for safely stripping insulation from wires if needed.
- Voltage Tester: To verify no current is present.
- New Outlet: Select a model that matches your needs, such as a standard outlet, GFCI, or one with USB ports.
Step-by-Step Guide: Changing Your Outlet
With safety checks complete and tools in hand, you're ready to start the transformation.
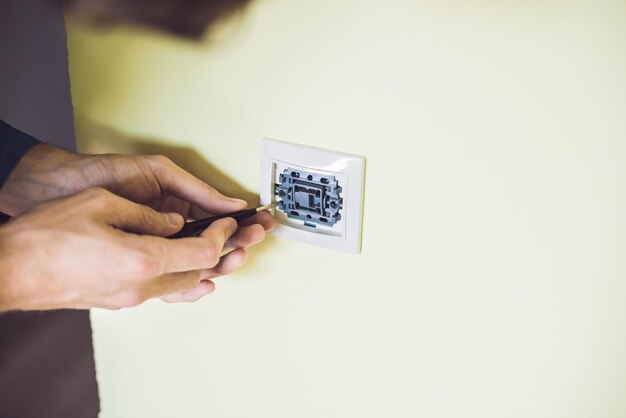
Step 1: Remove the Existing Outlet
- Unscrew the Faceplate: Use your screwdriver to gently remove the outlet's faceplate.
- Unscrew the Outlet: Next, unscrew the mounting screws holding the outlet in place from the electrical box.
- Gently Pull the Outlet Out: Carefully pull the outlet away from the wall to expose the wiring.
Step 2: Disconnect the Wiring
- Take Note of Wire Placement: Before proceeding, take note of where each wire connects to the outlet. You might even take a photo for reference.
- Remove Wires: Loosen the terminal screws and disconnect the wires. Handle the wires with care to avoid damaging them.
Step 3: Connect the New Outlet
- Prepare the Wires: If necessary, use wire strippers to trim and expose fresh copper wire for a secure connection.
- Attach Wires to the New Outlet:
- Black (Hot) Wire: Connect to the brass terminal.
- White (Neutral) Wire: Connect to the silver terminal.
- Green or Bare (Ground) Wire: Attach to the green terminal.
Step 4: Install the New Outlet
- Mount the Outlet: Carefully push the outlet back into the box, securing it with mounting screws.
- Attach the Faceplate: Once securely in place, attach the new faceplate.
Step 5: Test the New Installation
- Restore Power: Go back to your circuit breaker and turn the power back on.
- Verify with a Voltage Tester: Check the outlet to ensure it’s working correctly.
💡 Additional Tips: Making the Most of Your Upgrade
Changing an outlet opens up possibilities beyond mere functionality. Consider these options to maximize your upgrade:
- Upgrade to a GFCI Outlet: In areas like kitchens and bathrooms, replacing standard outlets with Ground Fault Circuit Interrupter (GFCI) outlets can enhance safety by preventing electric shocks.
- Choose Outlets with USB Ports: Simplify device charging with integrated USB outlets, eliminating the need for adapters.
📝 Key Takeaways
Here’s a quick-reference list to ensure a seamless outlet replacement:
- 🛑 Turn Off the Power: Never skip this critical safety step.
- 🧰 Have the Right Tools: Preparation saves time and hassle.
- 🖼️ Document Wiring Layout: Use a camera to capture wire connections.
- 🔄 Consider Upgrades: Think about future needs, such as USB or GFCI features.
- 📏 Double Check Work: Always test the outlet before closing the panel.
Troubleshooting Common Issues
Even with perfect preparation, you might encounter a few hiccups. Here are common issues and how to tackle them:
- Outlet Doesn’t Work: Double-check your wiring connections and ensure all screws are tight.
- Tripped Circuit Breaker: Check for any short circuits. Ensure wires aren't crossing each other.
- Loose Outlet: Make sure the outlet is securely screwed into the box and that the box itself is stable.
Bringing It All Together
Changing an electrical outlet might seem daunting at first, but by following these steps, it becomes a manageable DIY task. Remember, safety is paramount, so always ensure power is off and verification with a voltage tester is done. With proper preparation and the right mindset, you will not only have a successful installation but also enhance your dwelling’s electrical safety and convenience. Happy updating!
Related Topics
- How Can I Change Text Message To Imessage
- How Can You Change a Jpeg To a Pdf
- How Do I Change a Jpeg To a Pdf
- How Do I Change a Pdf To a Jpg
- How Do I Change a Pdf To a Word Document
- How Do I Change a Repeating Decimal To a Fraction
- How Do I Change a Text Message To An Imessage
- How Do I Change From Text To Imessage
- How Do I Change Lowercase To Uppercase In Word
- How Do I Change My Political Party To Independent
