Your Guide to Preserving Your Harvest: A Thorough Guide On Canning And Drying Techniques
What You Get:
Free Guide
Free, helpful information about Other and related Preserving Your Harvest: A Thorough Guide On Canning And Drying Techniques topics.
Helpful Information
Get clear and easy-to-understand details about Preserving Your Harvest: A Thorough Guide On Canning And Drying Techniques topics and resources.
Personalized Offers
Answer a few optional questions to receive offers or information related to Other. The survey is optional and not required to access your free guide.
How to Preserve Your Harvest: Essential Canning and Drying Techniques
Imagine stepping into your pantry during the chill of winter and finding rows of beautifully preserved fruits and vegetables ready to be enjoyed. Preserving your harvest not only brings the essence of summer to your meals year-round but also reduces food waste and saves money. Whether you're a seasoned gardener or a newbie to sustainable living practices, mastering the art of canning and drying can elevate your culinary experiences. Let's explore these time-honored techniques that capture and extend the essence of every planting season.
🌟 Understanding the Benefits of Food Preservation
Preservation is Key
Preserving food is more than just extending shelf life; it's about capturing the peak flavors of your produce and maintaining its nutritional value. By canning and drying your harvest, you're not only reducing waste but also being kinder to the planet.
Economical and Sustainable
Preserving food is a cost-effective way to enjoy seasonal produce all year round. By buying in bulk during peak season or growing your own, you benefit from better pricing and reduce your dependence on store-bought goods.
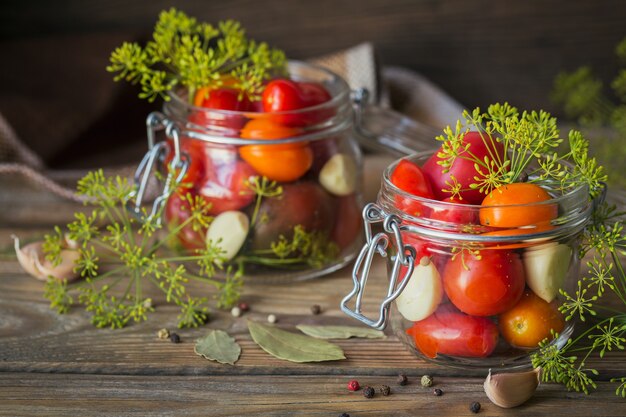
🥫 Canning Basics: The Art of Long-Term Storage
Canning is a preservation method that involves placing foods in jars and heating them to a temperature that destroys microorganisms and inactivates enzymes. This process forms a vacuum seal as the jars cool, preventing new bacteria from spoiling the food.
Types of Canning: Water Bath vs. Pressure Canning
Water Bath Canning
This method is ideal for high-acid foods, such as jams, jellies, fruit preserves, pickles, and salsas. The high acidity prevents bacterial growth, making it a safe and simple technique for beginners.
Pressure Canning
For low-acid foods like vegetables, meats, poultry, and seafood, pressure canning is the way to go. It reaches higher temperatures than water bath canning, safely preserving foods that are otherwise prone to bacterial contamination.
📝 Essential Tools for Canning
- Canning Jars: Mason or Ball jars that seal tightly.
- Lids and Bands: New lids are crucial for ensuring a proper seal.
- Canning Funnel: For filling jars without spills.
- Jar Lifter: To safely handle hot jars.
- Pressure Canner or Water Bath Canner: Depending on the type of food you're preserving.
Step-by-Step Guide to Canning
- Prepare Your Ingredients: Wash, peel, or chop produce as needed.
- Sterilize Jars: Boil jars and lids in water for at least 10 minutes.
- Fill the Jars: Use a canning funnel to load jars with produce, leaving headspace.
- Seal the Jars: Place the lid and band on each jar, securing them finger-tight.
- Process in Canner: Depending on the method, process jars for the recommended time for your recipe.
- Cool and Store: Allow jars to cool overnight. Check seals and store in a cool, dark place.
🌿 Tips for Successful Canning
- Inspect Lids: Always use new lids to ensure a reliable seal.
- Check Seals: Once cooled, press the center of each lid. If it doesn’t flex, your seal is good.
- Label and Date: Note the contents and processing date on each jar for easy identification.
🌞 Drying Foods: Embrace Nature’s Preserver
Drying, one of the oldest methods of food preservation, involves removing moisture from food to inhibit the growth of bacteria, yeast, and molds.
Methods of Drying
Air Drying
Best for herbs and some vegetables, air drying is simple and energy-free. Hang produce in warm, dry, and well-ventilated areas until they become brittle.
Sun Drying
Appropriate for fruits like tomatoes and peppers, sun drying relies on the heat from the sun and takes place in low-humidity environments.
Oven Drying
An accessible option for drying small amounts of fruits and vegetables at home using your oven.
Dehydrator
For those serious about drying, a food dehydrator offers controlled temperatures and faster results.
📋 Steps for Drying Foods
- Prepare Food: Wash, peel, and slice produce uniformly for even drying.
- Pre-Treat if Necessary: Soak fruits such as apples in lemon juice to prevent browning.
- Arrange on Racks or Trays: Spread slices in a single layer.
- Dry Thoroughly: Follow specific temperature guidelines and times for each food type.
- Condition and Store: Allow dried food to cool, then store in airtight containers.
🧂 Practical Tips for Drying
- Uniform Slices: Ensure even drying by cutting slices of similar thickness.
- Check for Doneness: Properly dried foods should have a leathery or brittle texture.
- Store Properly: Use airtight containers to prevent moisture from re-entering.
📝 Handy Summary: Canning vs. Drying
| Aspect | Canning | Drying |
|---|---|---|
| Best For | High-acid and low-acid foods | Fruits, vegetables, and herbs |
| Equipment Needed | Pressure/Water Bath Canner, Jars, Lids | Dehydrator/Oven/Racks, Airtight Containers |
| Shelf Life | 1 year or more | Several months to 1 year |
| Storage | Cool, dark place | Cool, dry place |
| Pros | Long shelf life, preserves flavor/texture | Retains nutrients, no refrigeration needed |
| Cons | Requires more equipment, time-consuming | May alter flavors, requires monitoring |
🌟 Bringing It All Together
Preservation is about more than just stocking up; it's an intimate interplay with the seasons and an art form that connects us to our food. Whether through the satisfying pop of a canning jar lid or the fragrant crunch of dried herbs, these techniques empower us to savor the best of every season. By exploring the age-old methods of canning and drying, you're not just preserving food—you're preserving memories, flavors, and a way of life.
By following these guidelines and exploring the diverse options within canning and drying, you'll be able to enjoy the taste of summer produce all year long and share the bounty of your harvest with guests and family time and time again. So, gather your jars, roll up your sleeves, and start preserving today! 🌿🥫
What You Get:
Free Other Guide
Free, helpful information about Preserving Your Harvest: A Thorough Guide On Canning And Drying Techniques and related resources.

Helpful Information
Get clear, easy-to-understand details about Preserving Your Harvest: A Thorough Guide On Canning And Drying Techniques topics.

Optional Personalized Offers
Answer a few optional questions to see offers or information related to Other. Participation is not required to get your free guide.

Discover More
- A Comprehensive Guide To Community Cooperative Childcare: A Grassroots Solution
- A Guide To Online Second-Hand Shopping: Platforms, Tips, And Tricks
- Affordable After-School Programs And Clubs: A Complete Guide
- Affordable Group Therapy: Benefits And How To Find
- Affordable Natural Therapies For Mental Well-being
- Avoiding Financial Scams And Pitfalls: A Comprehensive Guide
- Backpacking On a Budget: A Guide For The Minimalist Traveler
- Beginners Guide To Thrifting: Stretching Your Dollar Further
- Beyond Clothing: Thrifty Finds For Home And Kitchen
- Budget-friendly Garden Start-ups: From Seeds To Harvest